Overview
Once your account is set up, StrongKeep automatically starts scanning your company’s email and website security using the domain from your work email address.
This helps detect issues like expired certificates, weak encryption, or unsafe redirects — so you know your website and email are protected.
Steps
1. Automatic Setup
-
When you first log in, StrongKeep detects your company’s domain (e.g.,
yourcompany.com) and verifies it automatically. -
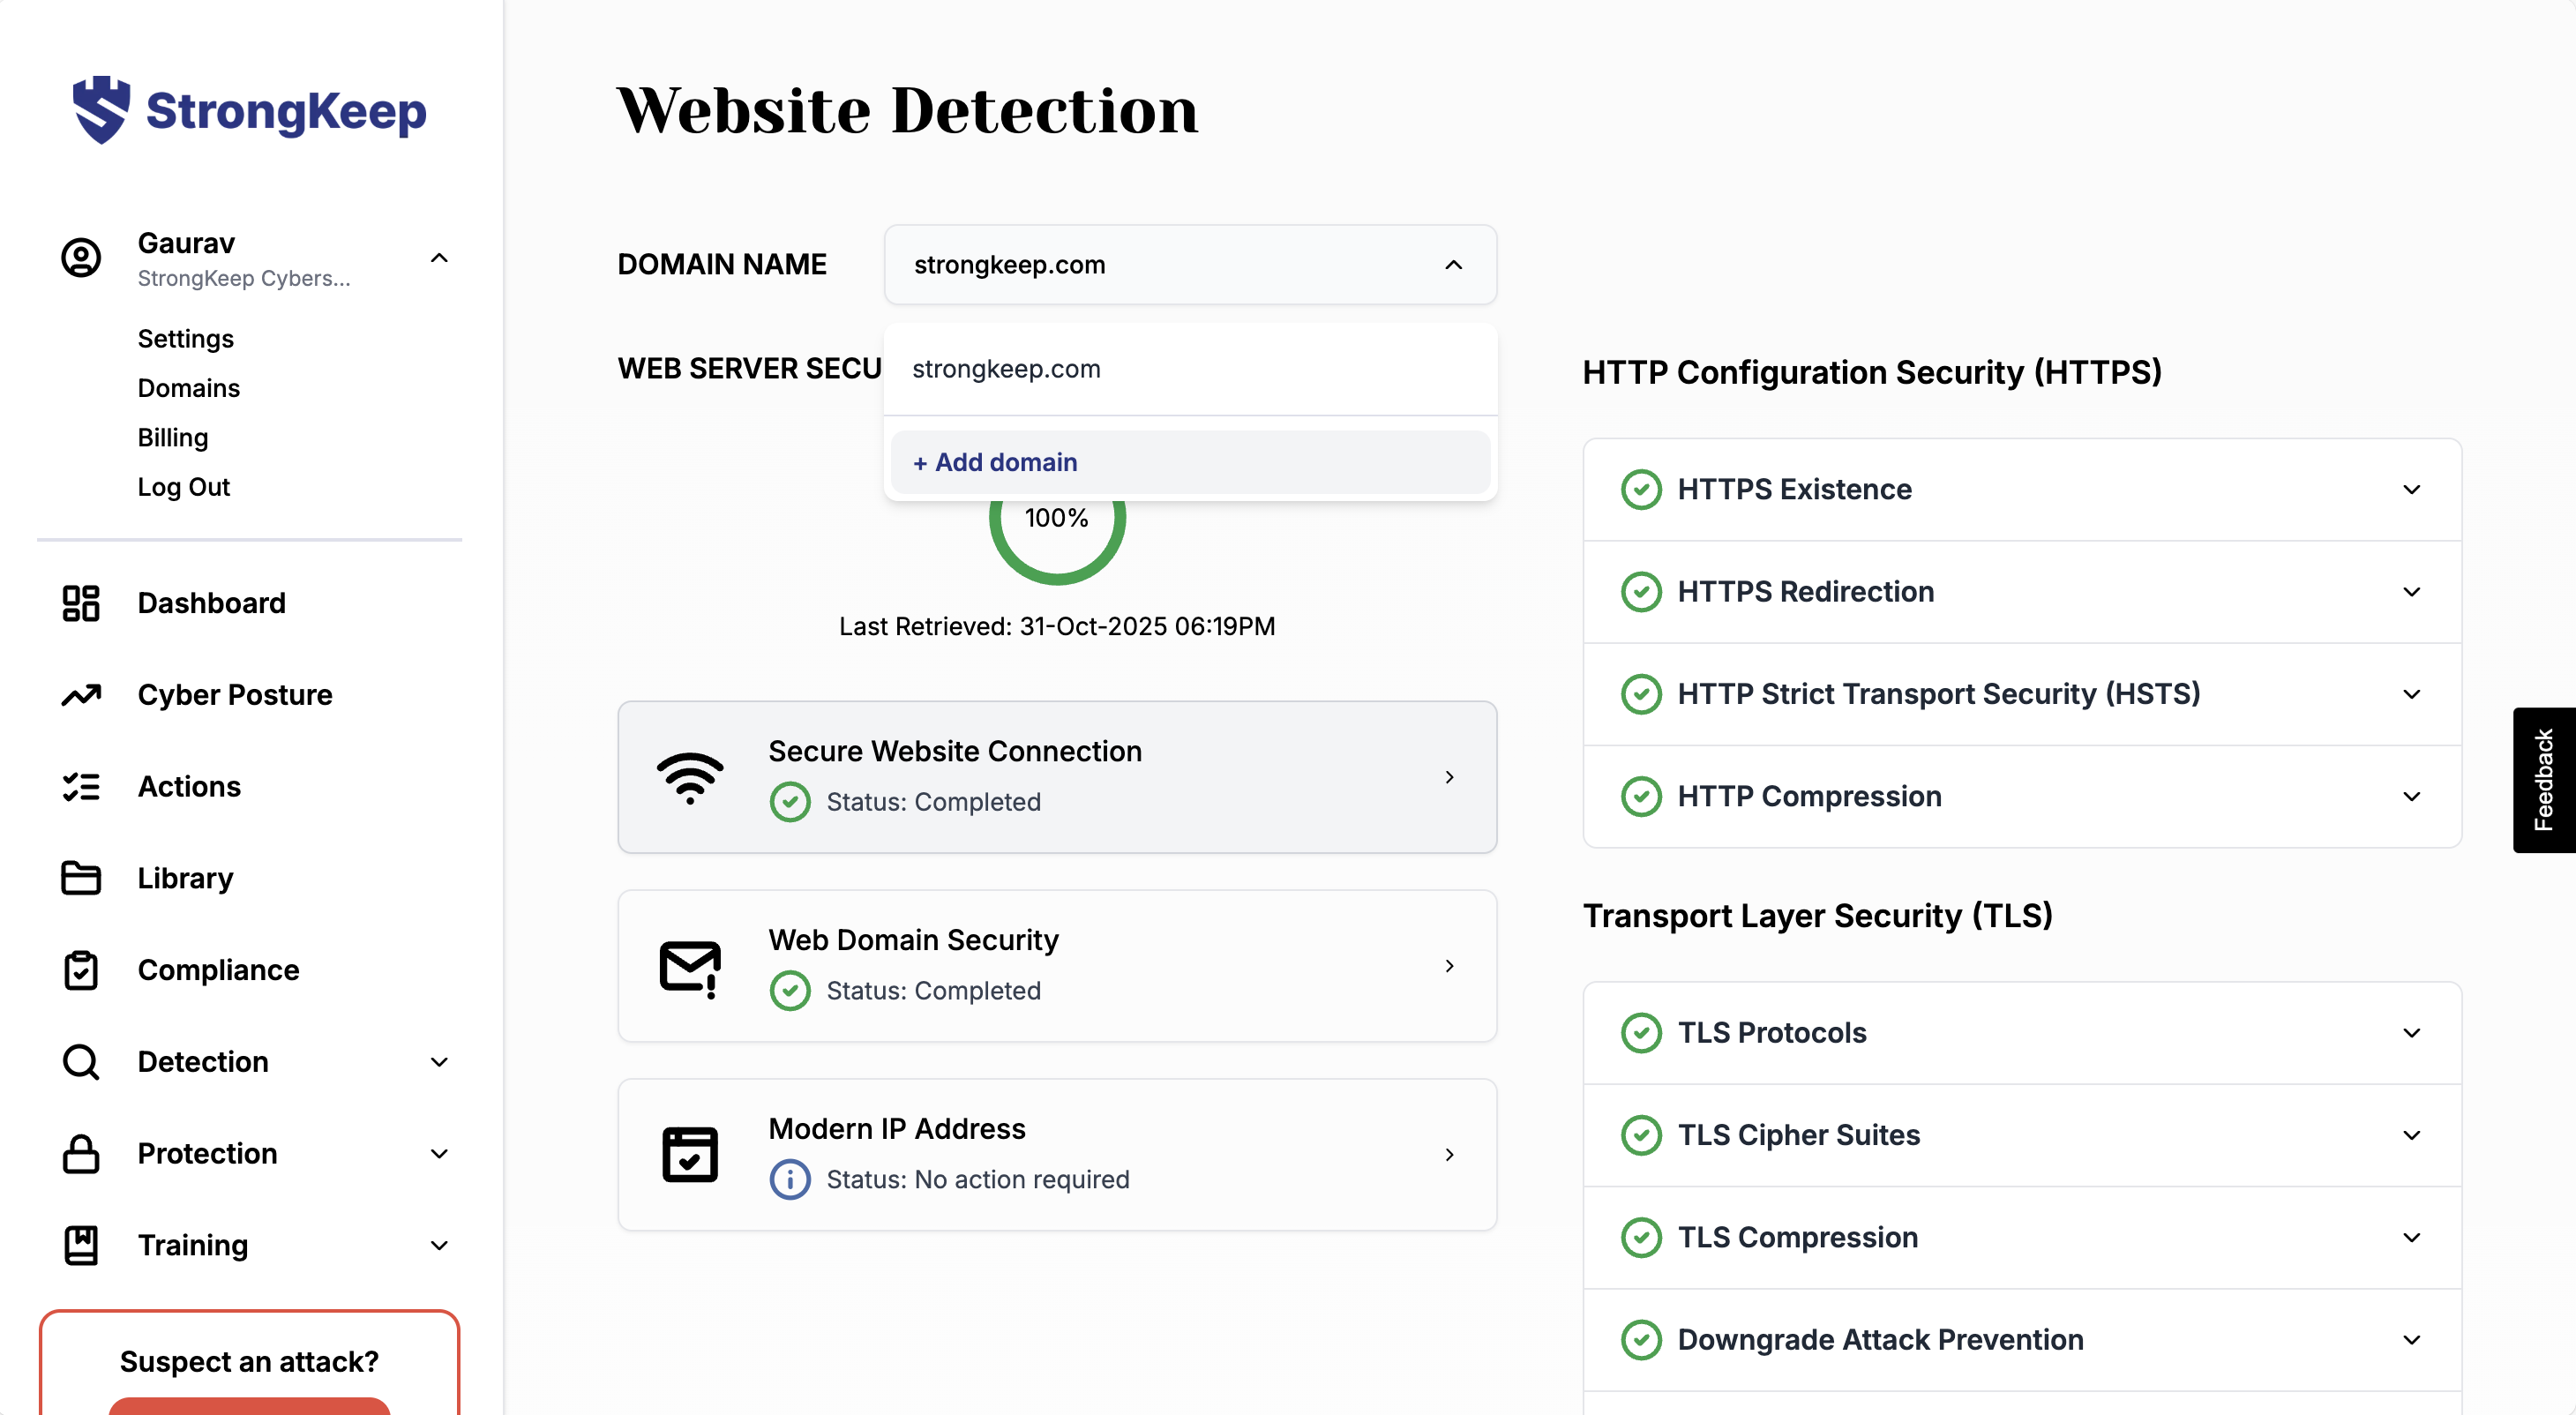
A scan for both Mail Server Security and Web Server Security begins right away — no action needed.
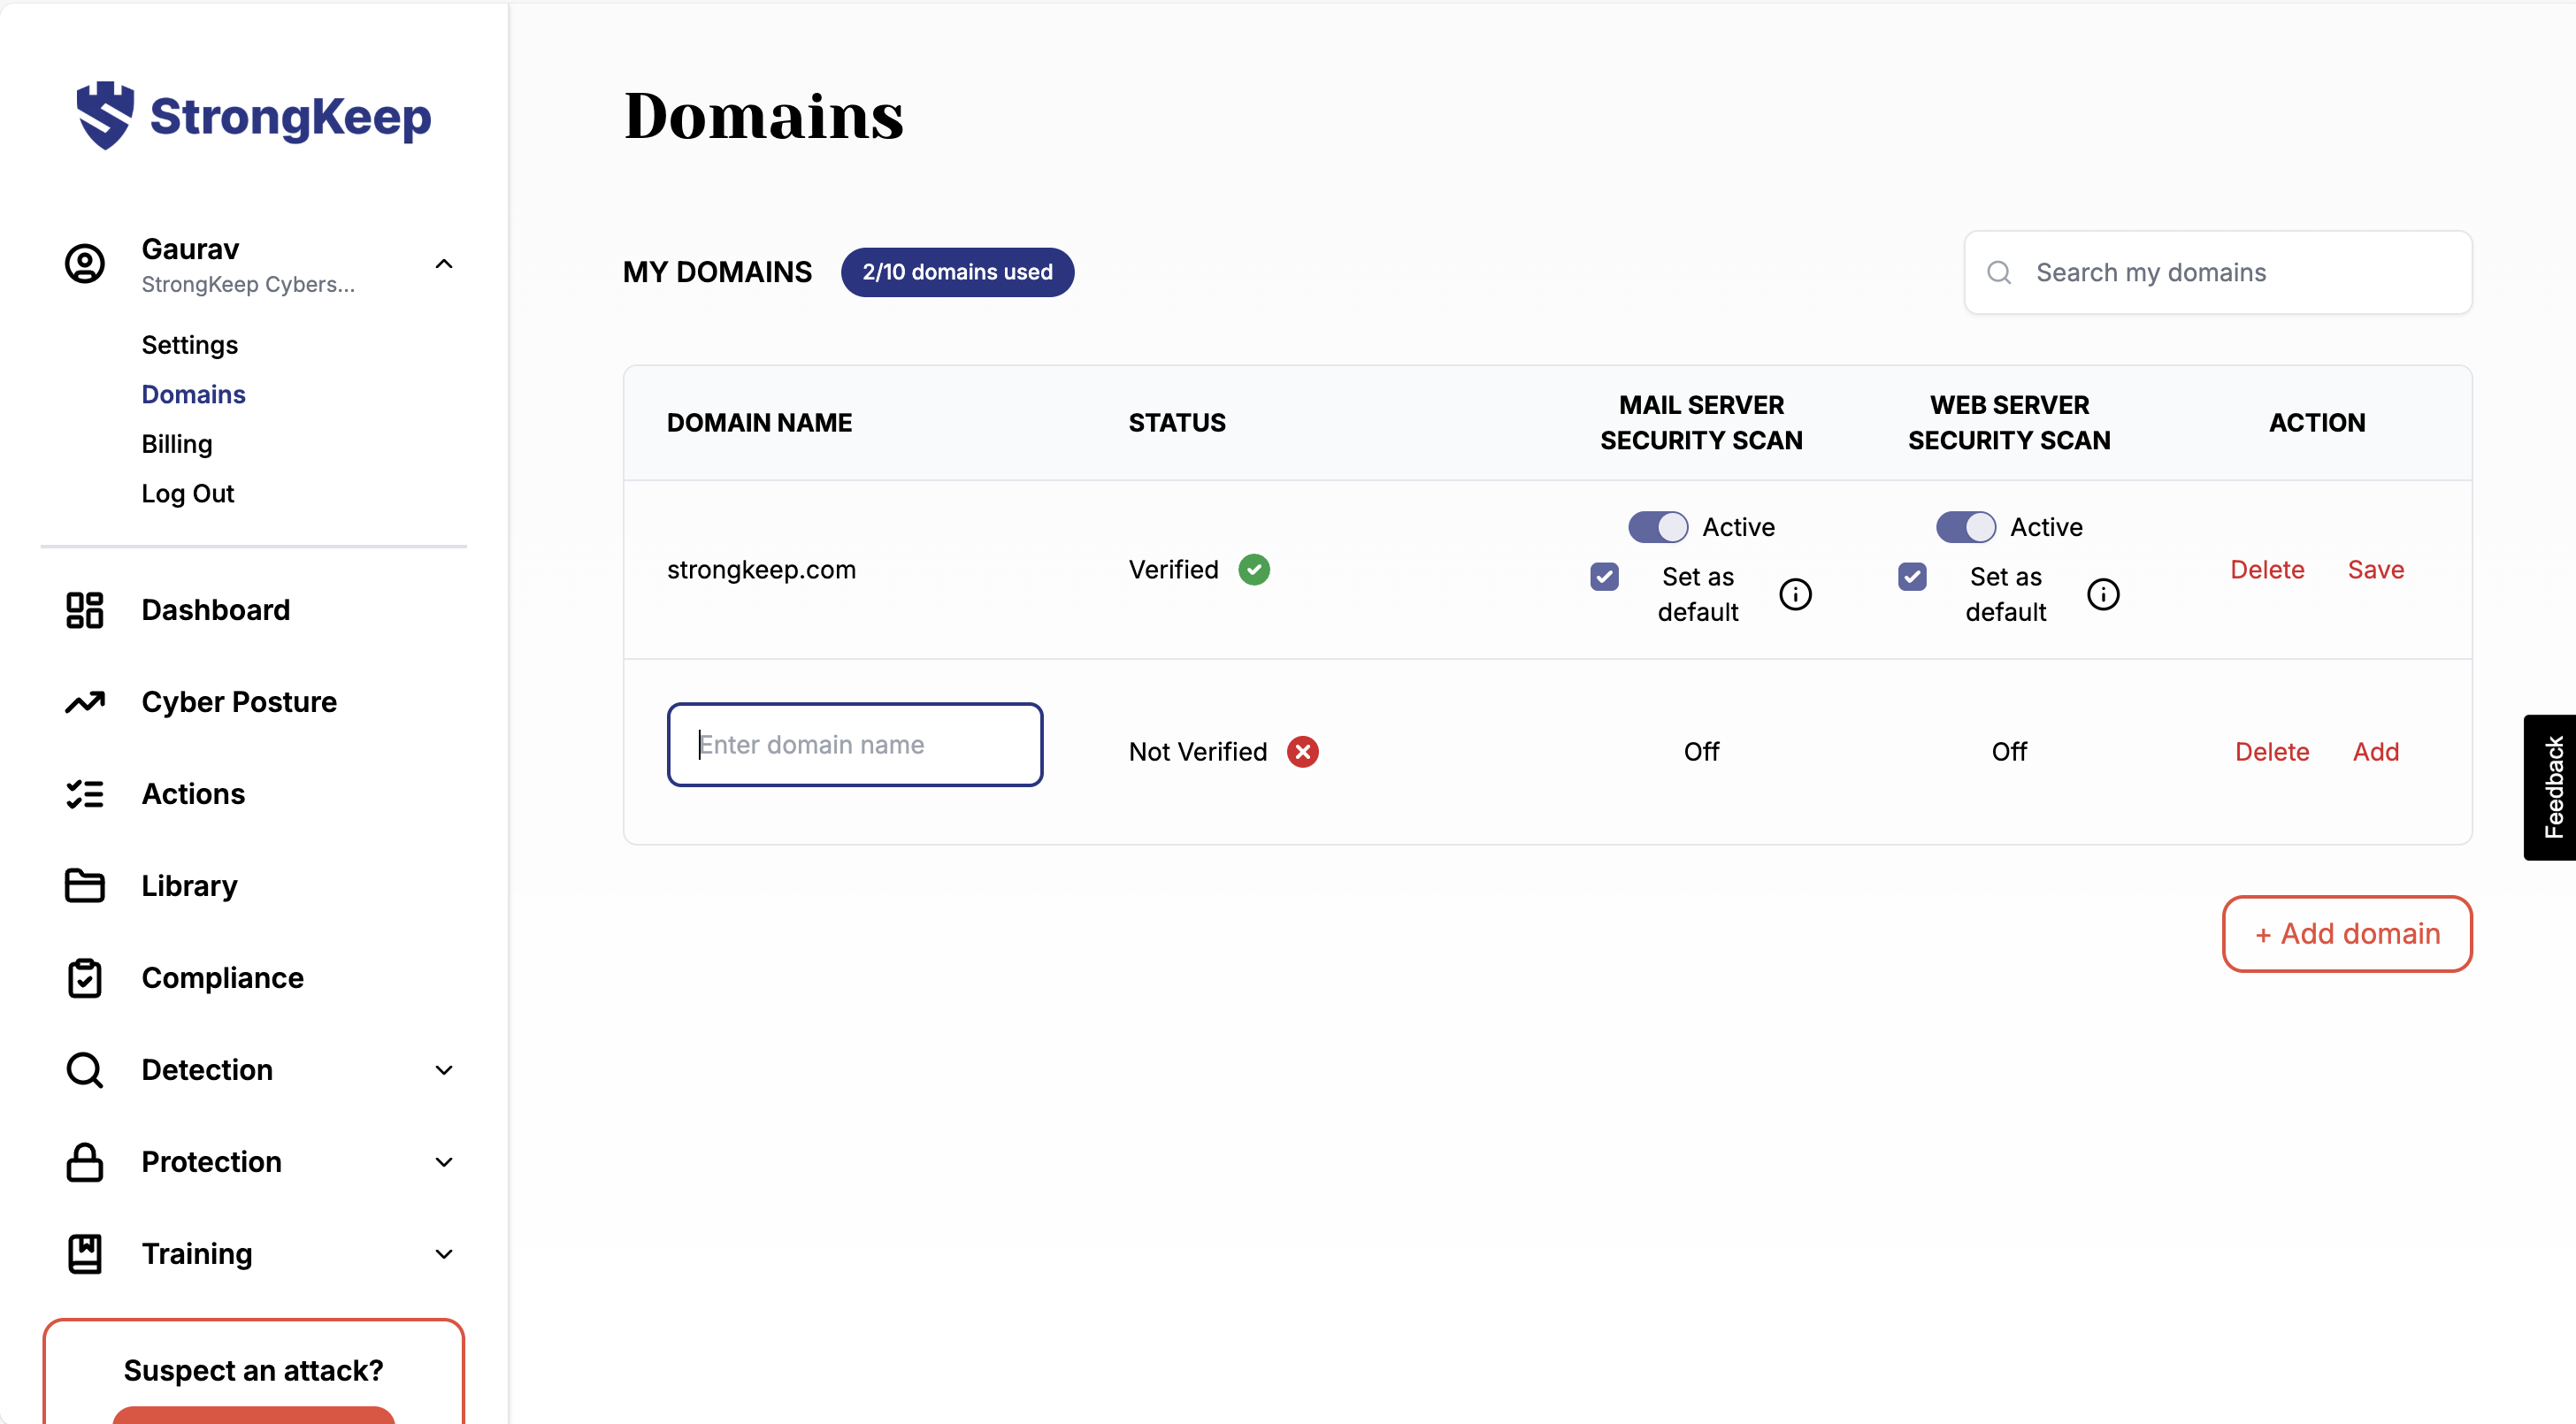
2. Adding More Domains or Subdomains
If your company uses multiple websites or custom subdomains (e.g., portal.yourcompany.com), you can add them easily:
-
Go to Settings → Domains.
-
Click + Add domain.
-
Enter the new domain name.
-
Click Add to save it.
💡 Tip: You can also add domains directly from the Website/Email Detection page.
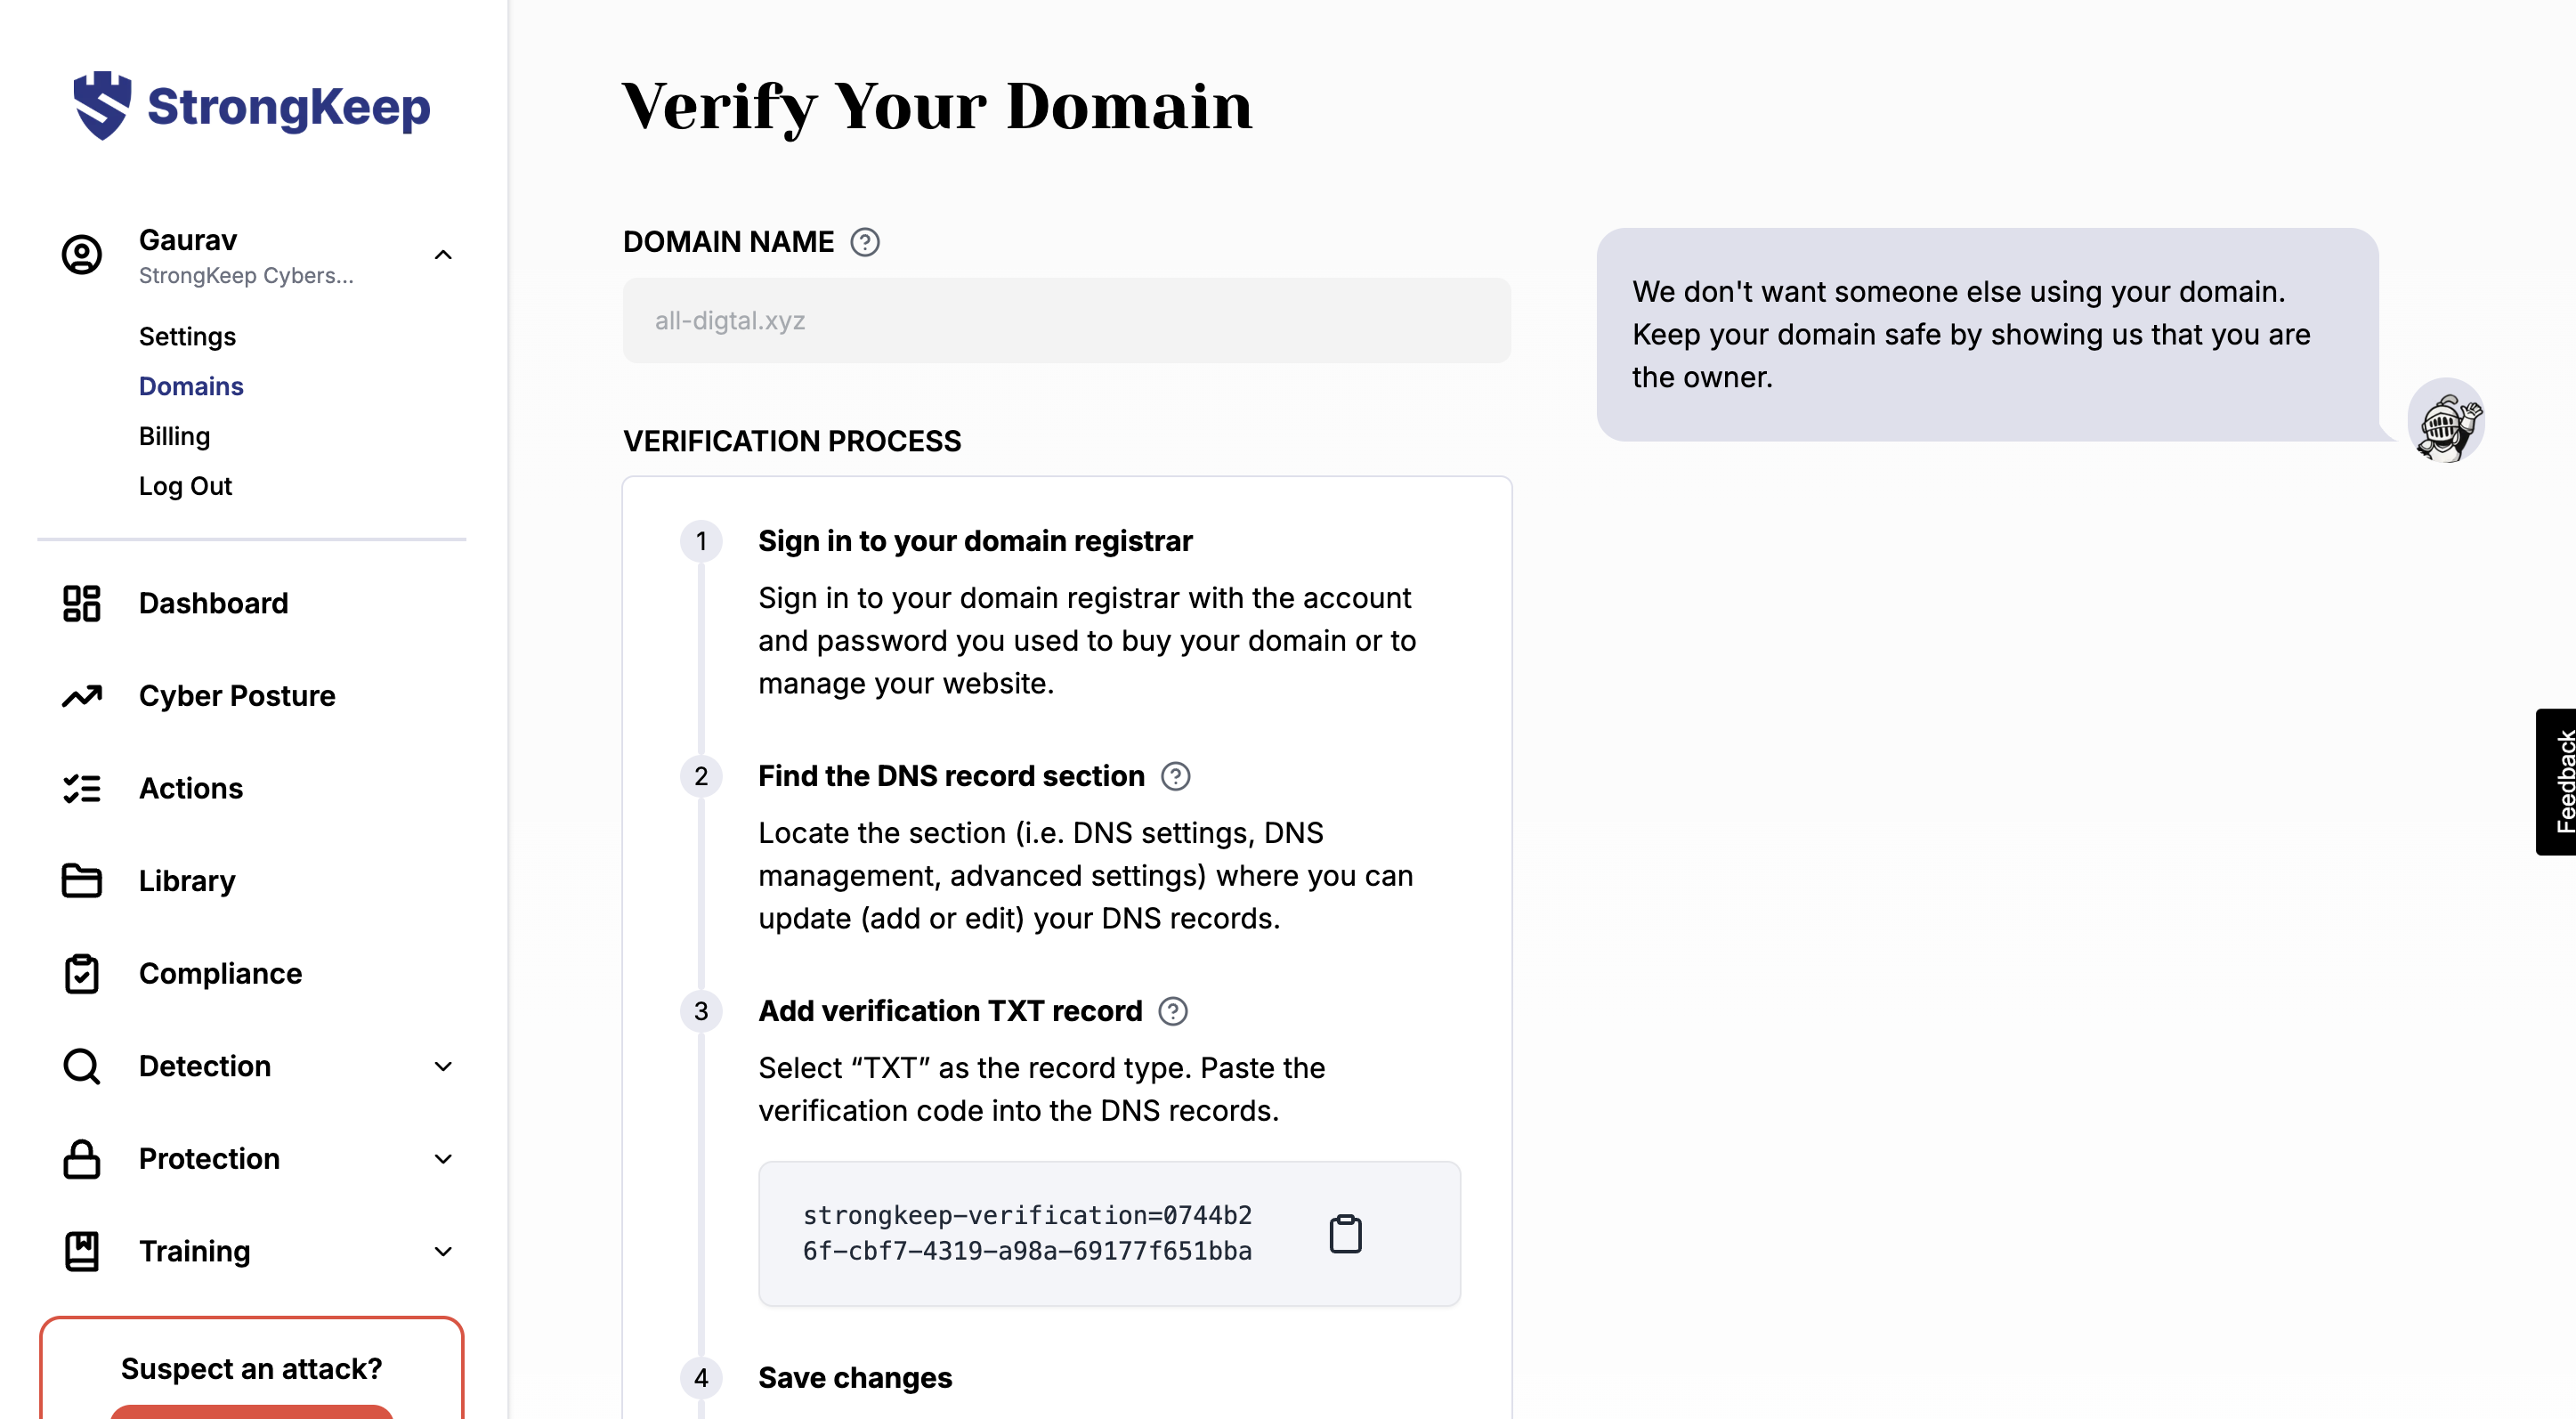
3. Verifying a New Domain
If it’s a new domain, verification is needed to confirm ownership.
To verify:
-
Click Verify beside the domain name.
-
Follow the steps shown — you’ll need to add a TXT record to your DNS.
-
Once the record is detected, the domain will show as Verified ✅ and scans will start automatically.
4. Managing Active Scans
-
Domains that don’t host a main website can be switched off under Settings → Domains.
-
Add only the domains or subdomains you want to monitor — such as your main website, client portal, or web app.
-
Scans refresh periodically; no manual action is needed.
5. Viewing and Sharing Results
-
Each scan result shows a security score (e.g., 82% or 100%).
-
🟢 Green (80–100%): Good — your website and email are well protected.
-
🟠 Orange (50–79%): Some fixes recommended.
-
🔴 Red (<50%): Immediate action advised.
-
-
Click into each scan to see details and resolution steps.
-
You can share reports with your web host or IT provider for quick fixes.
StrongKeep continuously improves its recommendations — so your security gets better over time.